Are you a citizen of Kenya or Laos planning to visit India? If so, you’ll need to apply for an Indian visa. This article will guide you through the process of obtaining an INDIAN VISA FOR KENYAN CITIZENS or INDIAN VISA FOR LAOS CITIZENS.
From gathering the necessary documents to completing the online application form, paying the visa fee, scheduling an appointment, attending the visa interview, and finally receiving your Indian visa – we’ve got you covered.
By following these steps, you can ensure a smooth and hassle-free visa application process. So, let’s dive in and get you ready for an incredible journey to India!
Key Takeaways
- Prepare for the visa interview by practicing common interview questions and demonstrating genuine intent to visit India.
- Understand the processing time for the Indian visa, which can vary from 4 to 7 working days.
- Be aware of the common reasons for visa rejection, such as incomplete documents, false information, ineligibility, insufficient funds, or a criminal record.
- Ensure application preparation is correct and have all required documents in order to increase the chances of a positive outcome and being granted the Indian visa.
Visa Requirements for Kenyan and Laotian Citizens
The visa requirements for citizens of Kenya and Laos are slightly different. If you’re a Kenyan or Laotian citizen planning to visit India, it’s essential to understand the visa process for your respective country.
For Kenyan citizens, the first step is to apply for an e-visa online. You can do this by visiting the official website of the Indian Visa Online Application System. Fill in the required information, including personal details, passport information, and travel details. Once you’ve completed the application, pay the visa fee online. After submission, you’ll receive an electronic visa approval letter via email, which you need to print and carry with you during your trip to India.
On the other hand, the visa application process for Laotian citizens involves submitting the application in person at the Embassy of India in Laos. You’ll need to fill out the visa application form and provide supporting documents such as your passport, recent photographs, travel itinerary, and proof of sufficient funds. It’s advisable to apply well in advance to allow ample time for the visa processing.
Once you’ve understood the visa process for Kenyan and Laotian citizens, the next step is to gather the necessary documents. This includes your passport, photographs, visa application form, proof of travel, and any other supporting documents required by the Indian authorities. By ensuring you have all the required documents, you can proceed with confidence in your visa application process.
Gather the Necessary Documents
To get the Indian visa, you’ll need to gather all the required documents. Here is a checklist of the documents you’ll need to apply for an Indian visa:
- Valid passport: Make sure your passport is valid for at least six months beyond your intended stay in India. Also, ensure it has at least two blank pages for visa stamps.
- Visa application form: Fill out the online visa application form accurately and completely. Be prepared to provide personal information, travel details, and your purpose of visit.
- Passport-sized photographs: Attach two recent passport-sized photographs with your visa application form. Make sure they meet the specifications mentioned on the application form.
Once you have gathered these documents, you are ready to move on to the next step, which is completing the online application form. The online application form is an essential part of the visa application process. It allows you to provide all the necessary information required for your visa application. Remember to double-check the information you provide to avoid any discrepancies.
Complete the Online Application Form
Once you’ve gathered all the necessary documents, it’s time for you to dive into completing the online application form for your Indian visa. This step is crucial, as it ensures that your application is processed smoothly and without any delays. To make the process easier for you, here are some tips to keep in mind.
Firstly, make sure you have a stable internet connection and a compatible device to access the online application form. It is essential to complete the form using a computer or a tablet, as mobile devices may not display the form correctly.
Next, carefully read and understand each question before providing your answers. Pay close attention to details such as spelling and punctuation to avoid any errors. Double-check your entries before moving on to the next section.
One common mistake to avoid is rushing through the application. Take your time and provide accurate information. Any discrepancies between the information provided and the supporting documents can lead to delays or even rejection of your visa application.
Another tip is to have all the necessary information and documents readily available before starting the application. This includes your passport details, travel itinerary, and contact information. Having these details at hand will save you time and prevent any unnecessary back-and-forth while filling out the form.
Lastly, make sure to review the completed form thoroughly before submitting it. Look for any missing or incorrect information. Once you are satisfied with your application, submit it and proceed to the next step of paying the visa fee.
Completing the online application form accurately is crucial for a successful Indian visa application. Now that you have finished the form, it’s time to move on to paying the visa fee.
Pay the Visa Fee
Now that you’ve successfully completed the online application form, it’s time to move forward by paying the visa fee. The visa fee is an essential step in the process of obtaining an Indian visa for Kenyan and Laotian citizens. To make the payment, you have various options available. The Indian government has introduced multiple visa payment methods to ensure convenience for applicants. Let’s take a look at these methods in the table below:
| Payment Method | Description |
|---|---|
| Online Payment | Pay the visa fee using your credit or debit card through the secure online payment portal. |
| Bank Transfer | Transfer the visa fee directly from your bank account to the designated Indian embassy or consulate account. |
| E-wallet | Utilize popular e-wallet services like PayPal or Skrill to pay the visa fee electronically. |
| Cash Payment | Visit the designated bank or visa application center to pay the fee in cash. |
It’s important to note that certain individuals may be eligible for visa fee exemptions. These exemptions are granted to specific categories such as government officials, diplomats, and certain types of visa applicants. If you believe you qualify for an exemption, ensure you have the necessary documents to support your claim.
With the visa fee paid, you can now proceed to the next step of scheduling an appointment at the Indian embassy or consulate. This appointment is crucial for submitting your application documents and completing the necessary formalities. So, let’s move forward and find out how to schedule this appointment in the subsequent section.
Schedule an Appointment at the Indian Embassy or Consulate
Ready to take the next exciting step? Schedule an appointment at the Indian embassy or consulate and get one step closer to your Indian adventure! To begin the process, you have two options for the embassy or consulate location: New Delhi or Mumbai. Both cities have well-established facilities and experienced staff to assist you throughout the visa application process.
When scheduling your appointment, keep in mind that availability may vary, so it’s best to plan ahead. You can contact the embassy or consulate directly or visit their website to find out the available dates and time slots. Remember to have all your documents ready, as you may need to provide them during the appointment.
To ensure a successful visa interview, there are a few tips to keep in mind. Firstly, arrive at the embassy or consulate on time or even a few minutes early. Punctuality shows your commitment and respect for the process. Next, dress appropriately and professionally to make a good impression. It’s also important to be prepared and knowledgeable about your travel plans and purpose of visit to India. Answer the interview questions confidently and truthfully, providing any supporting documents if necessary.
With your appointment scheduled and these tips in mind, you are now ready for the visa interview. This is the final stage before obtaining your Indian visa, so make sure to approach it with confidence and enthusiasm. Good luck on your Indian adventure!
Now, let’s move on to the next section about attending the visa interview.
Attend the Visa Interview
When attending the visa interview, it’s crucial to present yourself professionally and confidently to leave a lasting impression on the embassy or consulate staff. Here are some tips to help you prepare for your visa interview:
- Dress appropriately: Choose formal attire that shows respect for the process and the officials conducting the interview. Avoid wearing casual or revealing clothing.
- Bring the necessary documents: Make sure you have all the required documents, such as your passport, visa application form, and supporting documents. Organize them in a neat and orderly manner.
- Be prepared to answer common interview questions: The embassy or consulate staff may ask you about your purpose of travel, duration of stay, accommodation arrangements, and financial stability. Practice your answers beforehand to appear confident and well-prepared.
- Show genuine intent: Clearly explain your reasons for visiting India and demonstrate that you have no intention of overstaying your visa or engaging in any illegal activities.
- Maintain eye contact and speak clearly: It’s essential to establish good communication with the interviewers. Maintain eye contact, speak clearly, and answer questions concisely.
By following these visa interview preparation tips, you can increase your chances of a successful interview.
Once the interview is done, you will move forward to the subsequent section about receiving your Indian visa, where you will learn about the next steps in the process.
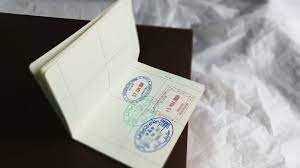
Receive Your Indian Visa
After successfully completing your visa interview, you will proceed to the next step of the process: receiving your Indian visa. The visa processing time may vary depending on several factors, including the current workload at the Indian embassy or consulate where you submitted your application. Generally, it takes around 4 to 7 working days for the visa to be processed.
While waiting for your visa, it’s essential to understand the possible reasons for visa rejection. This knowledge can help you avoid common mistakes and ensure a higher chance of approval. Some common reasons for visa rejection include incomplete or incorrect documentation, providing false information, not meeting the eligibility criteria, insufficient funds to support your stay in India, and having a criminal record.
To provide you with a better understanding, here is a table summarizing the visa rejection reasons:
| Visa Rejection Reasons | Explanation |
|---|---|
| Incomplete Documents | Failing to submit all the necessary documents or providing incomplete ones |
| False Information | Providing incorrect or misleading information |
| Ineligibility | Not meeting the eligibility criteria set by the Indian government |
| Insufficient Funds | Failing to demonstrate adequate financial resources to support your stay |
| Criminal Record | Having a criminal background that raises concerns for public safety |
By being aware of these potential reasons for visa rejection, you can ensure that you have prepared your application correctly and have all the required documents in order. This will increase your chances of receiving a positive outcome and being granted your Indian visa.
Frequently Asked Questions
What is the validity period of an Indian visa for Kenyan and Laotian citizens?
The validity period of an Indian visa for Kenyan and Laotian citizens varies depending on the type of visa applied for. You can find more information about the application process on the official Indian visa website.
Are there any specific requirements for the passport photograph for the online application form?
For the online application process, the passport photograph requirements include a recent color photo with a white background. Make sure your face is clearly visible, without any accessories or headgear, and the photo is in the specified format.
Can the visa fee be paid in the local currency or does it have to be paid in Indian Rupees?
You can pay the visa fee in the local currency or Indian rupees. The payment options are flexible, but it’s important to check the exchange rate to ensure you’re paying the correct amount.
How long does it usually take to schedule an appointment at the Indian Embassy or Consulate?
It usually takes a few days to schedule an appointment at the Indian embassy or consulate. The scheduling process is straightforward, and appointment availability can vary, so it’s best to plan ahead.
Is it possible to receive the Indian visa through postal mail or does it have to be collected in person?
Yes, it is possible for Kenyan and Laotian citizens to receive their Indian visa through postal mail. It is one of the alternative methods available for collecting the visa without having to visit the embassy or consulate in person.
Conclusion
In conclusion, applying for an Indian visa as a Kenyan or Laotian citizen requires several steps. First, you need to gather all the necessary documents. These may include your passport, passport-sized photographs, proof of travel plans, and proof of financial stability.
Next, you will need to complete the online application form. This form will require you to provide personal information, such as your name, address, and date of birth. You will also need to provide details about your travel plans, including the purpose of your visit and the duration of your stay in India.
After completing the application form, you will need to pay the visa fee. The fee can be paid online using a credit or debit card. Once the fee is paid, you will receive a confirmation email.
The next step is to schedule an appointment at the Indian Embassy or Consulate. This appointment is for a visa interview. During the interview, you will be asked questions about your travel plans and the purpose of your visit to India. It is important to be prepared and provide accurate and honest answers.
After the interview, your application will be processed, and if approved, you will receive your Indian visa. The visa will be affixed to your passport, allowing you to travel to India.
To increase your chances of a successful application, it is important to follow all the visa requirements and provide all the required information accurately. Double-check your application before submitting it to avoid any mistakes or omissions.
Good luck with your visa process!