- Determine the type of visa that suits your purpose of travel.
- Gather all the necessary documents, such as your passport, photographs, and supporting documents.
Once you have everything ready, you can:
- Complete the online application form, making sure to provide accurate and up-to-date information.
- Pay the visa fee.
- Schedule an appointment at the Visa Application Center.
Finally, you can:
- Track the status of your application to stay informed.
Let’s get started on this important process to ensure a smooth and hassle-free journey to India.
Key Takeaways
- Determine the appropriate visa type based on the purpose of your visit to India and meet the eligibility criteria.
- Gather all the required documents, including a valid passport, recent color photograph, travel itinerary, and employment/education history.
- Complete the online application form accurately, providing personal information and uploading the necessary supporting documents.
- Pay the visa fee in the correct currency and schedule an appointment at the Visa Application Center for biometric data collection.
Determine the Type of Visa You Need
Once you’ve decided to apply for an Indian visa online, you’ll need to figure out which type of visa suits your travel needs, transporting you to a vibrant world of possibilities. Understanding the visa application process and the visa eligibility criteria is crucial to ensure a smooth and successful application.
To begin, you must determine the purpose of your visit to India. Whether it’s for tourism, business, medical treatment, or education, each category has its own specific visa type. For instance, if you plan to explore India’s rich cultural heritage, a tourist visa would be appropriate. On the other hand, if you are attending a business conference or exploring business opportunities, a business visa would be required. It is essential to identify the correct visa type to avoid any complications or delays in the application process.
Once you have determined the purpose of your visit and the corresponding visa type, you must familiarize yourself with the visa eligibility criteria. This includes factors such as your nationality, the duration of your stay, and any specific requirements imposed by the Indian government. For instance, some visas may require you to provide proof of financial stability or a letter of invitation from an Indian sponsor.
Understanding the visa application process and eligibility criteria is vital as it ensures that you meet all the necessary requirements. By doing so, you increase your chances of obtaining the visa smoothly and expediently.
With this in mind, let’s move on to the next section, where we will discuss gathering the required documents to complete your online application.
Gather the Required Documents
First, make sure you’ve got all the necessary documents ready to go for your exciting trip to India. Gathering the required documents is an important step in the Indian visa online application process.
To fill out the application accurately, here are some useful tips. Firstly, have your passport handy as you will need to provide details such as the passport number, issue date, and expiry date. Additionally, you will need to upload a recent color photograph of yourself, so make sure you have a digital copy ready. It’s important to note that the photograph should meet the specified requirements in terms of size, background color, and facial expression.
Another document you will need is a digital copy of your itinerary, which should include details about your travel dates, accommodation, and return flight. Lastly, be prepared to provide information about your employment or education history, as well as any previous visits to India.
When filling out the online application form, accuracy is key. Double-check all the information you enter to ensure there are no errors or typos. Common mistakes to avoid include misspelling your name, providing incorrect passport details, or failing to provide accurate travel dates. These mistakes can lead to delays or even rejection of your visa application. Take your time and review the form before submitting it.
Now that you have gathered all the necessary documents, you are ready to move on to the next step: completing the online application form. Remember to review all the information you have gathered before proceeding to ensure a smooth and accurate application process.
Complete the Online Application Form
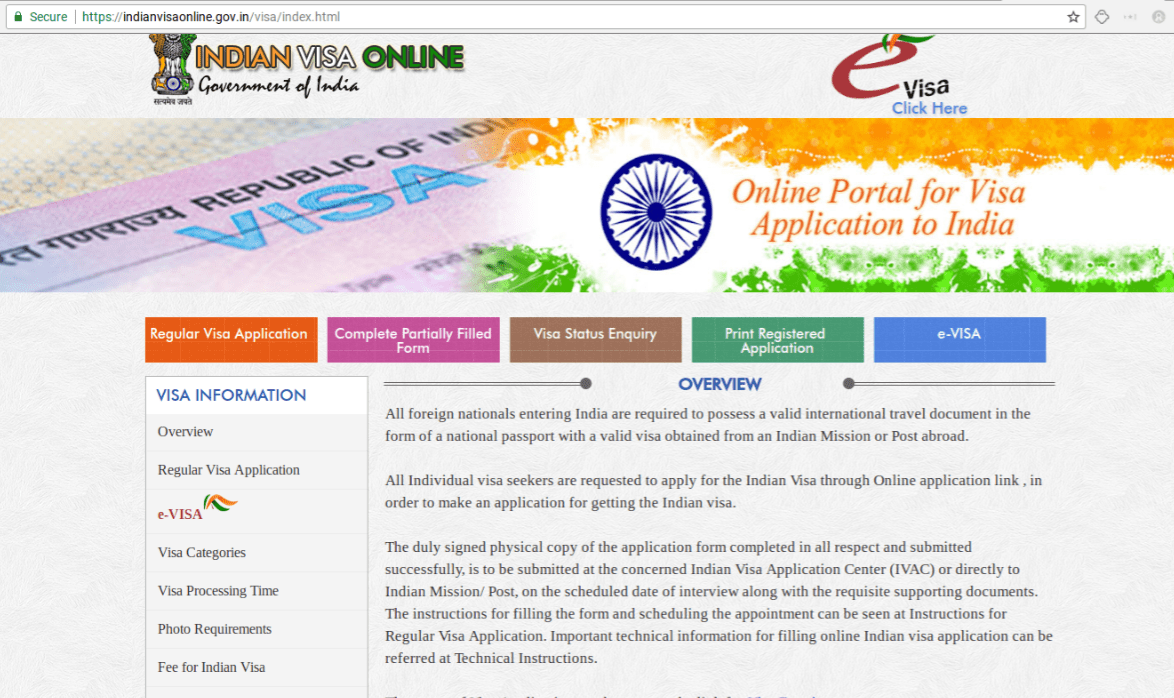
To complete the online application form for an Indian visa, you’ll need to create an account on the designated website.
Once you’ve created an account, you’ll be required to provide personal information such as your name, address, and contact details.
Additionally, you’ll need to upload supporting documents such as your passport, photograph, and any other required documents as specified in the application guidelines.
Create an Account
Get ready to create your account and start your Indian visa online application now! Setting up a profile is quick and easy. To begin, go to the official Indian visa website and click on the “Create Account” button. Fill in the required fields, such as your email address, password, and security question. Once you’ve completed the form, click “Submit” and a verification email will be sent to your registered email address. Click on the link provided in the email to activate your account. Now you can log in and start your visa application process. Provide personal information, such as your name, address, and passport details, to proceed with your application. Remember to double-check all the information before submitting.
Provide Personal Information
Now it’s time for you to share your personal details to move forward with the process. Remember, providing accurate information is crucial for your Indian visa application. Here are some common mistakes to avoid:
- Incorrect spelling or mismatched names: Make sure to enter your name exactly as it appears on your passport. Any discrepancies may lead to delays or even rejection of your application.
- Inaccurate contact information: Double-check your phone number and email address to ensure they are correct. This will enable the authorities to contact you if needed and keep you updated on the progress of your application.
- False or incomplete information: It is essential to provide truthful and complete details about your personal history, travel plans, and employment. Any inconsistencies may raise suspicion and result in the rejection of your visa.
By avoiding these mistakes, you increase your chances of a successful application.
Now, let’s move on to the next section where you’ll learn how to upload supporting documents.
Upload Supporting Documents
Make sure you have all the necessary documents ready for uploading, as this step is crucial in completing your Indian visa application process. When uploading supporting documents, it is important to be aware of the different file formats accepted. The Indian visa online application system allows for documents in PDF, JPEG, or PNG formats, with a maximum file size of 300KB. Common document mistakes to avoid include submitting blurry or illegible scans, using incorrect file formats, or failing to provide all the required documents. To ensure a smooth application process, double-check that all your supporting documents are clear, complete, and in the correct format. Once you have successfully uploaded the required documents, you can proceed to the next section and pay the visa fee.
Pay the Visa Fee
To complete your online Indian visa application, simply pay the visa fee and effortlessly progress to the next step. When it comes to payment methods, the Indian visa application allows for various options to suit your convenience. You can choose to pay through debit or credit cards, net banking, or even use popular digital payment platforms. This flexibility ensures a hassle-free experience for applicants from all over the world.
Now, let’s talk about the fee structure. The visa fee for Indian visa application depends on the type and duration of your visit. It is essential to check the official website or consult the Indian embassy or consulate in your country to get the accurate fee details. The fee can be paid in your local currency, and the online application system will automatically convert it to the required amount in Indian Rupees.
Once you have successfully paid the visa fee, you can move on to the next step of scheduling an appointment at the visa application center. This will allow you to submit your supporting documents, undergo biometric data collection, and complete the necessary formalities. It is important to carefully follow the instructions provided and bring all the required documents to avoid any delays or complications.
In conclusion, paying the visa fee is a crucial part of the online Indian visa application process. With multiple payment methods available and a transparent fee structure, it has never been easier to make the payment and continue with your application.
So, let’s move on to the next section and learn how to schedule an appointment at the visa application center.
Schedule an Appointment at the Visa Application Center
Once you’ve paid the visa fee, you can easily schedule an appointment at the visa application center. Here’s how you can go about it:
- Visit the official website of the visa application center and navigate to the appointment scheduling section.
- Fill in your personal details, including your name, contact information, and passport details.
- Select a convenient date and time slot for your appointment from the available options.
- Make sure to double-check all the information you have provided before submitting your appointment request.
- Once your appointment is confirmed, you will receive a confirmation email with all the necessary details, including the date, time, and location of your appointment.
Scheduling an appointment at the visa application center is an important step in the visa application process. It helps ensure an organized and efficient workflow for both the applicants and the center. By having a scheduled appointment, you can avoid long waiting times and receive personalized attention during your visit.
Now that you have successfully scheduled your appointment, the next section will guide you on how to track your application status. It is crucial to stay updated on the progress of your visa application, and tracking it will provide you with the necessary information you need.
Track Your Application Status
After scheduling an appointment at the Visa Application Center, it’s important to stay updated on the progress of your Indian visa application. This can be done by tracking your application status online.
To track your application status, visit the official website of the Indian visa application center and navigate to the tracking section. Enter the required details such as your application reference number and date of birth to access the latest information about your application. This will provide you with real-time updates on the status of your visa, whether it is still being processed or has been approved.
While tracking your application status, it is also beneficial to check the estimated processing time for your specific visa type, whether it’s an Indian Visa Application or you’re applying for an Indian Visa Online. This will give you an idea of how long it may take for your application to be processed. Keep in mind that processing times can vary depending on the type of visa and the volume of applications being processed at the time.
If you have any concerns or questions regarding your application status, don’t hesitate to contact the customer support team. They are available to assist you and provide any necessary information or clarification. Whether you have inquiries about the processing time or need assistance with any other aspect of your visa application, the customer support team will be able to guide you through the process.
By actively tracking your application status and staying in touch with customer support, you can ensure a smooth and hassle-free experience throughout the Indian visa application process.
Frequently Asked Questions
What is the processing time for an Indian visa application?
To get an Indian visa approved, you need to provide the required documents. It usually takes around 3-5 business days for the processing of an Indian visa application.
Can I apply for an Indian visa online if I am currently residing in a country other than my home country?
Yes, you can apply for an Indian visa online with a foreign passport, even if you currently reside in a country other than your home country and have a tourist visa.
Are there any specific requirements for a business visa application?
For a business visa application, you need specific documents like a letter from your company, invitation letter from an Indian organization, and proof of funds. Follow the steps of filling the online application and scheduling an appointment.
Is it possible to expedite the processing of an Indian visa application?
Yes, you can expedite the processing of your Indian visa application. If you’re in a hurry, there are options available to speed up the process and avoid processing delays.
Can I apply for an Indian visa online if I have dual citizenship?
Yes, you can apply for an Indian visa online if you have dual citizenship. The online application process is the same as for other countries, but you may need to provide additional documentation regarding your dual citizenship implications.
Conclusion
Requirements for Indian visa online application:
- Determine the type of visa you need.
- Gather the required documents.
- Complete the online application form.
- Pay the visa fee.
- Schedule an appointment at the visa application center.
- Track your application status.
Congratulations on taking the necessary steps to travel to India and enjoy your journey!


