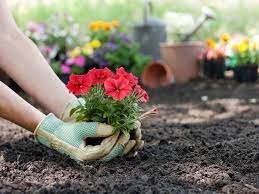

A rain barrel makes it easy to collect rainwater. You can reuse it to water your plants or wash your car. Rainwater is lime-free, so those streaks on your car are a thing of the past by using rainwater. During long periods of drought, we consume more tap water for drinking, filling the garden pool and watering the garden. Water companies have to pump more and more groundwater during these periods, to the detriment of the environment. With a rain barrel you use much less tap water and you can connect it to the downspout of your roof. Of course you can buy a rain barrel, but you can also easily make one yourself.
What you need
To make a rain barrel, you need a large barrel, but this can also be a large garbage can. The barrel forms the basis for the rain barrel. In addition to a barrel, you will also need wooden slats. Make sure these are not too wide because they will be glued around the barrel. You will also need a stand on which the barrel will stand and a rain barrel tap. You can use wider boards for the barrel lid. You will also need some tools, such as a circular saw, speed drill and PVC glue.You can get all the tools you need for this job at Pilgrim Tools.
Step-by-step plan
Step 1 Cutting the laths to size
We start by cutting slats to size. You can use a saw table or a circular saw to do this. The slats should be the same height as the barrel because they will come around the barrel. Make sure you can cover the whole barrel with slats, so you won’t see any more of the barrel. Don’t secure the slats yet, or you won’t be able to reach them properly while placing the tap.
Step 2 Drill hole in the barrel
Measure the diameter of the tap. Think about the height when placing the tap. Don’t place it too high, as this will leave too much water in the barrel, and make sure a bucket will fit underneath. Once you have chosen the right height, drill a hole in the barrel with a step drill or speed drill. Using a hole saw, make a round hole in one of the slats, drill the hole at exactly the same height as where the tap will be.
Step 3 Installing the tap and fastening the slats
Mount the tap in the hole and secure it with PVC glue. The lath with the round hole in it comes over the tap. Mount the lath with sealant. This will make the tap watertight. Lay the laths side by side on a flat surface. Spray the sealant in the places where the slats will be attached to the barrel. After this you can secure all the slats to the barrel.
Step 4 Cutting out the lid
To make the lid of the barrel, we need the dimension. Measure the diameter of the top of the barrel with a tape measure. Take several boards and make sure that together they are the same size as the top of the barrel. Screw the boards together with nails and a hammer using two layers of boards. Now that you have a square lid, let’s cut it out into a nice circle. Using a pencil, draw the circle on the lid and then cut out the circle.
Tip
Use a pencil and string to draw the circle. Attach a screw in the center of the lid. Make the string to length and attach a pencil to the end. Tie the rope to the screw and then draw a circle.
Step 5 Connecting the rain barrel to the downspout
There are two ways to connect the rain barrel to the downspout.
Filler with spout
If the downspout is connected to a drainage system, such as the sewer, you can connect it with a filler valve. A filler ensures that the rain barrel always collects water, but it is also at the same time an overflow. When the rain barrel is full, the excess water goes back down the drainpipe. First measure the distance between the ground and the top of the rain barrel. And mark this with a line on the downspout. Then cut the downspout at the line with a handsaw and attach the filler valve to the downspout. Make an opening in the rain barrel and insert the pipe of the automatic filler through the opening. Finally, seal the opening so that it is watertight.
Cutting the rain pipe
Another way is to connect the rain barrel directly to the downspout. To do this, you must first drill a hole in the lid of the rain barrel. Use a hole saw to do this. Make sure the hole is the size of the downspout. Now attach the downspout in the hole of the rain barrel. Drill another hole in the rain barrel auger so that when the rain barrel is full, it can drain to the garden.
Step 6 Tie rope around the rain barrel
To complete the rain barrel, you can tie a rope around it!