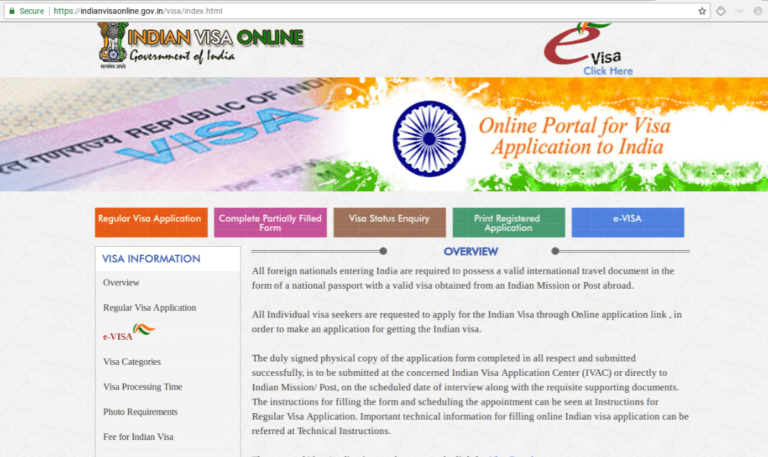
If you’re planning a trip to India, you’ll need to apply for an Indian visa. There are many different types of visas available, so you’ll need to make sure you choose the right one for your needs.
Most people don’t realize that getting a tourist or Indian Business Visa can be done online without visiting an embassy. This saves a lot of time and hassle, so it’s worth the effort!
1. Application Form
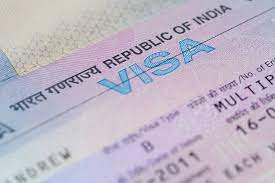
The Indian Visa Application for Tourist Visa and Business Visa consists of the necessary information regarding your trip to India. It also contains a list of required documents and fees.
It is recommended to complete the form completely and gather all of the required documents before submitting your application. This will save you time and ensure that you meet all the requirements.
You will also need to fill out a personal details form. This form will include your name, address, and other details. It will also ask for your passport number and date of birth.
This will help the Immigration Department to process your visa more quickly and accurately. It will also allow them to contact you if they have any questions.
In addition, you will need a photocopy of your passport and a picture of yourself that can be taken with your phone. You will also need to pay a small fee to apply for the e-visa.
The e-visa is an electronic document that lets you enter India without having to go to the embassy. It is an easy, fast, and convenient way to travel to the country. In addition to that, it’s a great way to save money and time. In some cases, you can even get your e-visa in a few days instead of a week or more. It’s also easier to use than a traditional visa, so it’s worth checking out if you’re interested in traveling to India.
2. Photographs
When you complete the Indian visa application for Tourist or Business, you will be required to upload certain photographs to the website. These images should be clear and recent and must not exceed 3 MB in size. The photos can be scanned from your passport or taken from your mobile phone.
Make sure that you are facing forward and standing straight and in the centre of the photograph. Also, ensure that the background is plain white or light color and does not have shadows on your face or background.
Please note that if your photo does not meet these requirements, the system will reject it and you will need to take another picture to satisfy our requirements. If you have a camera that allows you to capture multiple photos, this is an excellent way to ensure that you get a good image for your visa application.
After you have selected a photograph, click “Next.” Next, provide the file name, title, and month/year of publication for that photo. The spreadsheet will generate a warning message in the column marked “Missing Information” if you fail to include this information.
Finally, you will need to provide the name of the person who took the photograph, or if the photograph is a work made for hire, the company or organization that hired the photographer. This is usually the photographer’s full name unless the photograph is anonymous or pseudonymous.
Once you have completed this part of the process, you can submit your list of published photographs to the Copyright Office. You may upload your list to the website, or you can print it from the website and send it with a storage device to the address indicated on the shipping slip.
3. Biometrics
Applicants are required to upload their biometrics on the website and submit them along with all other documents. The biometrics include a fingerprint scan and a digital photograph of the applicant’s face. The visa application will be rejected if the applicant fails to upload the required documents.
The website explains that these documents are necessary to verify identity, character, past criminal records and other relevant information. They also help the Indian Immigration Department in determining whether or not an applicant should be granted a visa.
There are many websites offering services that help travelers register their biometrics. Those sites collect your fingerprints and other biometric data and store them in a central database.
From next year, Canada will require all visa applicants to give their biometrics when they apply for a visitor visa, study or work permit or for permanent residence. The Canadian government website says that this will be effective for visa applicants from Europe, Middle East and Africa from July 31, 2018, while those from Asia, Asia Pacific and the Americas must give their biometrics starting December 31st.
In August 2017, a similar measure was put into effect for certain visa applicants at the Indian Visa Application Centres in the United Kingdom. Currently, only US, UK and Schengen states require visa applicants to give their biometrics before they can be issued with a visa.
If you need to apply for a visa in the future, you can also register your biometrics online and submit them with all other documents. The process is fast and easy and it saves you time as well as money.
In addition to registering your biometrics, you will be required to provide your passport number and expiration date, as well as a copy of your passport-sized colored photograph (only of your face). You should also provide a valid email address and a credit/debit card to pay the visa fee.
4. Fees
If you are planning to travel to India for business purposes, you can apply for an e-visa. These visas allow business visitors to enter the country and meet with their Indian counterparts.
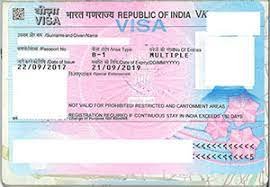
These visas are available for people from 180 countries. They are valid for a period of one year and are typically issued for multiple entries. The process to apply for this type of visa is very straightforward, and applicants do not need to make a physical stamp on their passport.
The fee for this type of visa can vary depending on the person’s nationality, but it is usually around US$160. It can be paid via a bank account online, or by using travellers’ cheques or cash.
You can also pay the fee in your local currency and exchange it upon arrival. This way, you will avoid paying a conversion rate and fees in foreign currency.
To apply for a Tourist and Business Visa, you will need to fill out an application form and submit your documents. These are then sent to a third party contractor, which handles all of India’s visa applications. This contractor has been handling the visas since 2014.
If you are applying for a Tourist and Business Visa, you can expect to receive your visa in 4 to 7 days. Once your application is complete, you can pay the fees and schedule your interview.
The application process to apply for an Indian visa is simple and straightforward, and there are no mix ups as long as you follow the guidelines and pay your fee in advance. There are some illegitimate websites out there that sell visas, but this website has been vetted and is reliable. It only takes about 2-3 minutes to complete the application.
5. Documents
There are many different types of Visas that you can apply for to enter India. Each type has its own set of requirements and the list of documents you need will vary based on that category.
Regardless of the kind of Visa you are applying for, there is one document that you must have with you before submitting your application: your Passport. Learn how to get your Passport ready and what you need to ensure it is valid for at least 6 months from the date of entry into India.
You will also need to upload a digital copy of your passport. This should be in a PDF, JPG or PNG format. It should not be more than 10MB and not less than 1MB in size.
When you’re uploading your documents, make sure you are using a reliable internet connection to ensure the quality is as good as possible. A slow connection could cause you to lose your data or receive errors.
After uploading your passport, you can start filling out the e-Visa application form. The information you provide in each column will be used to process your application. You’ll need to provide a valid email address as well, so that we can contact you in case of any issues during the process.
Once your e-Visa application has been processed, you will receive an email with your electronic travel authorization (ETA) that you can use to travel to India. This is an important document that you will need to bring with you on your trip and it can be printed at the airport.